

Postman is a tool used for testing, building, and modifying APIs (Application Programmable Interfaces). It is a very simple and intuitive platform used by developers, QAs, etc to build and test their APIs. You can make almost any type of HTTP request using Postman including but not limited to GET, POST, PUT, PATCH, DELETE, etc. Due to such a sleek user interface and usability nearly 5 Million developers and other people use Postman in a month. Apart from that, there are a lot of advanced things you can do like saving the environment or converting the API to code in other programming languages like C#, PHP, etc.
Why is Postman so popular for API Testing?
Case I - Without Postman
an. So what will be the process to make a GET request against a weather API to find out the weather in Los Angeles? First, you need to write the entire code for the route and then a function to make a request. It doesn’t end here, you need to write more code to declare what the response should look like. At last, you also need to develop a way to print the response.
Of course, one can say that you anyway need to write all this code when using the API functionality in the real application. But still, why is this just for testing API? And also not everyone possesses the programming skills to write code, which means they need to rely on the developers.
Fortunately, you won’t need to go out all the way and develop the entire code just for the sake of testing the API’s functionality because we have Postman.
Case II - With Postman
In Postman, you need to enter the URL with the route (endpoint) in the address bar, choose the GET method, simply enter the API key in the header, and hit the send button. You will get the response in the console below in whichever format you choose like JSON.
That’s all you need to do for checking the functionalities of API via Postman and this is one of the reasons why the Postman API testing method is so popular.
Postman Download and Install for Windows
Pre-requisites
- Disk space required ≈ 145 MB
- Windows 7 or above
- Postman v9.4 and prior are compatible with Windows 32-bit as well as 64-bit.
- The version after v9.4 will only work on Windows 64-bit.
Download and Installation
Here is the Postman Download link. From here you can download Postman for Windows.
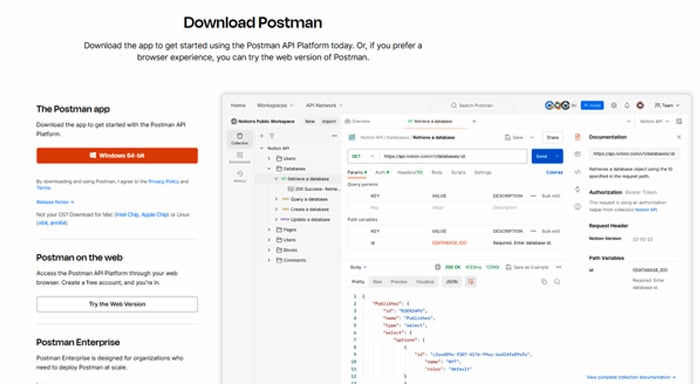
After clicking on the link a .exe file will be downloaded. Open the file and installation will begin automatically. The process will take just a few seconds and Postman will be ready to run.
The entire process will take less than 5 minutes, but if you don’t want to wait then you use their web version. For this, you’ll only need to sign up on their website. As a beginner, you won’t notice much difference.
Learning Postman
Here, we are going to explain important sections of the Postman. Learning everything about the Postman in one go can be overwhelming for you, therefore, we will explain the necessary steps initially.
Header
In the header section, you will get the option to navigate around your newly configured Postman account. Let’s have a look at them.
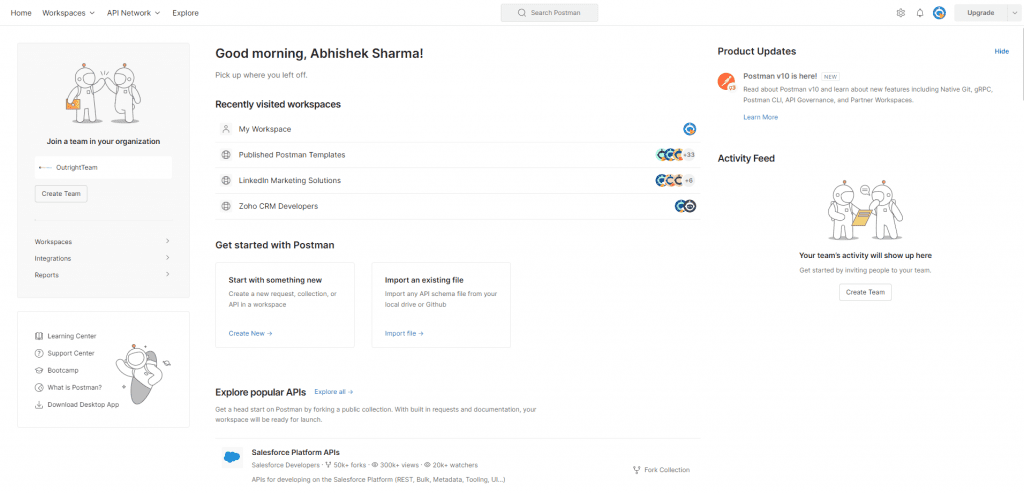
Home:
- This button will send you the homepage. It includes product updates, your recent visits, activity feed, etc. If you just finish setting up your account then you will see the getting started tutorial for Postman and the option to explore some popular APIs.
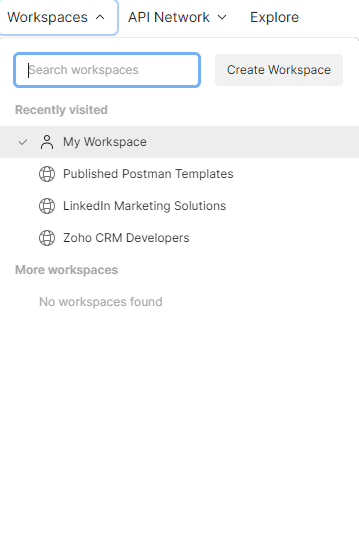
Workspace
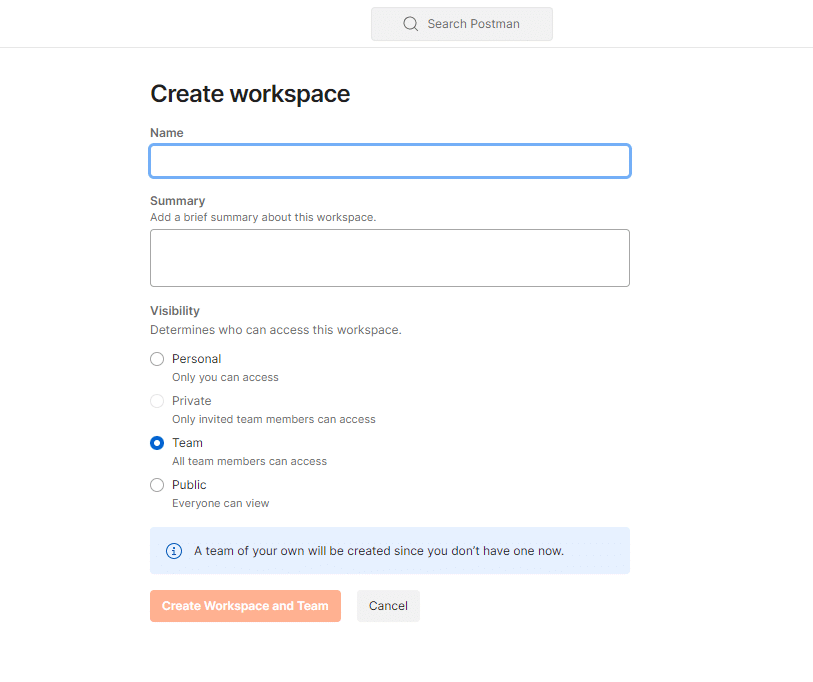
Postman workspace is a place where you can organize and collaborate on your API work within an organization or publicly. In a workspace, you can store all your API projects and assign a type to the same workspace for collaboration. There are three types of workspace that Postman provides.
- Personal Workspace: These are for individuals and are only visible to the person who created them. In a personal workspace, you will have access to all Postman tools.
- Team Workspace: In a team workspace, you can invite other team members to collaborate on API projects. The workspace admin can even assign roles to the invited members that limit actions on the workspace or element level. The team members get other features like adding a comment, using or even forking an element. In the free Postman plan, you can create a team space with up to three members in it.
- Public Workspace: A public workspace, as the name suggests, is accessible to everyone in the entire world. This is used when you want to share your project publicly. Once you make a public workspace, it will be visible on Postman’s Public API Network.
API Network
Here, you will see two options.
- Public Network: In the public network, you will get to see the APIs, workspaces, and collections of many developers and companies. For example, you can get an API collection of DocuSign, Meta, Salesforce, Notion, etc. You can even fork a collection from a public network to your workspace.
- Private Network: A private network is a centralized place that shows all the APIs your team is currently using. These APIs are only visible to those users who are part of the team.
- Explore: From this section, you can access everything including teams, workspaces, APIs, and Collections. You can also sort them based on different parameters like AI, communication, data analytics, DevOps, etc.
- Search Postman: This is used for searching from workspaces, collections, APIs, and teams in Postman.
Send First API Request From Postman
As we mentioned above, Postman provides you with a simple way of sending API requests. The process requires no programming knowledge whatsoever, you can easily test the functionalities of your API. You just need to enter the correct base URL, endpoints, and parameters of an API. For the demonstration, we are going to use the pet store API by Swagger.io. This sample API server allows you to make HTTP request methods like GET, POST, PUT, and DELETE.
Send a Request
- Open the Postman and click on the Workspaces dropdown. Here, open a workspace or create a new one.
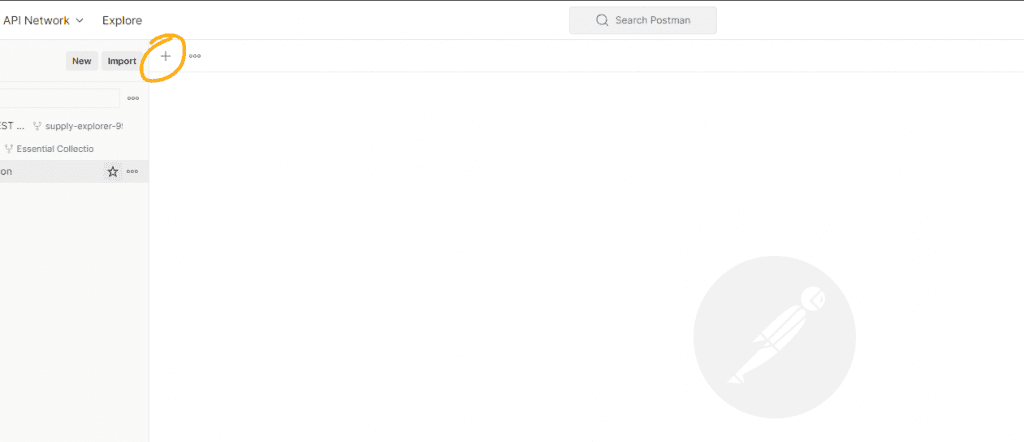
- Then, click on the “+” icon to open a new tab.
- Enter the request URL
petstore.swagger.io/v2/pet/findByStatus?status=availablein the bar.
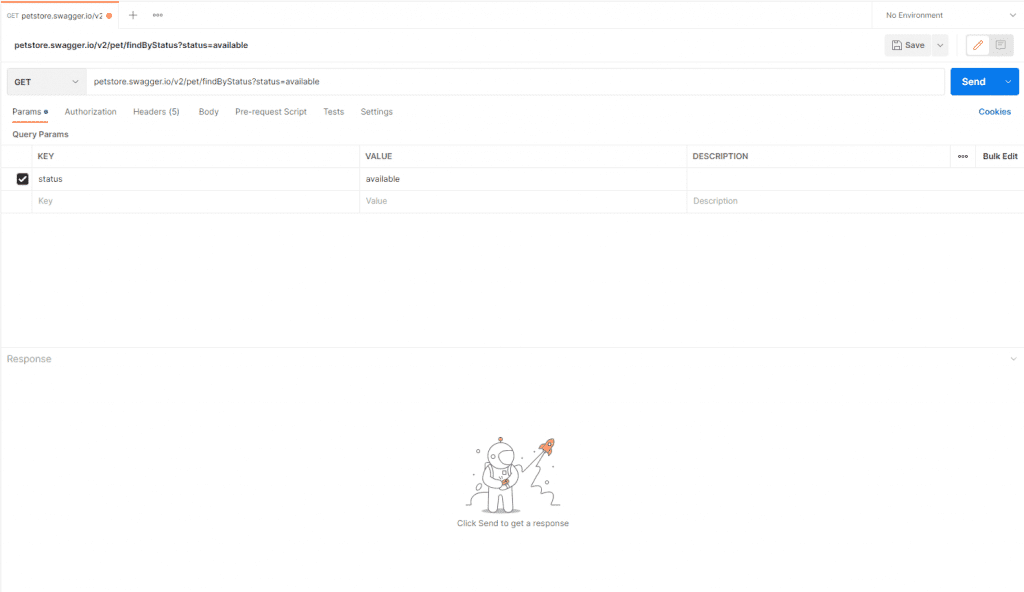
- Choose the HTTP Request Method GET using the dropdown.
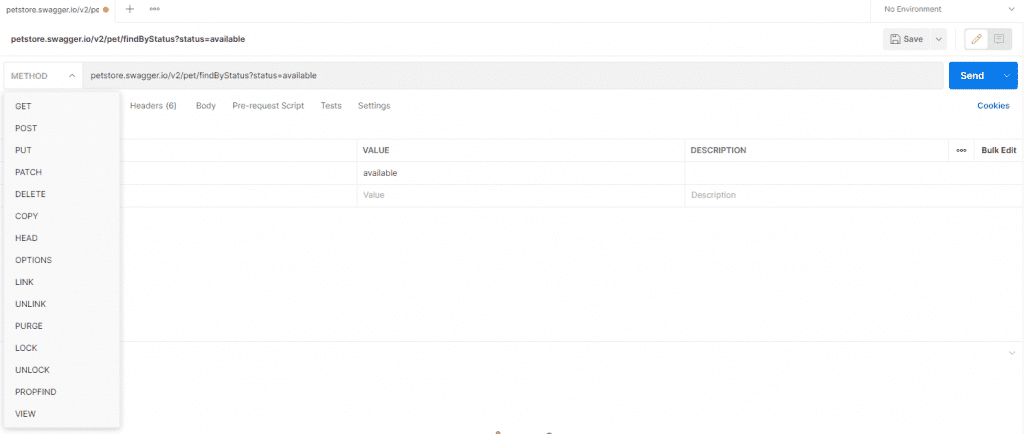
- Click on the send button.
After that, you will be able to see the response data in the lower panel. Now, let’s understand what you’re seeing there.
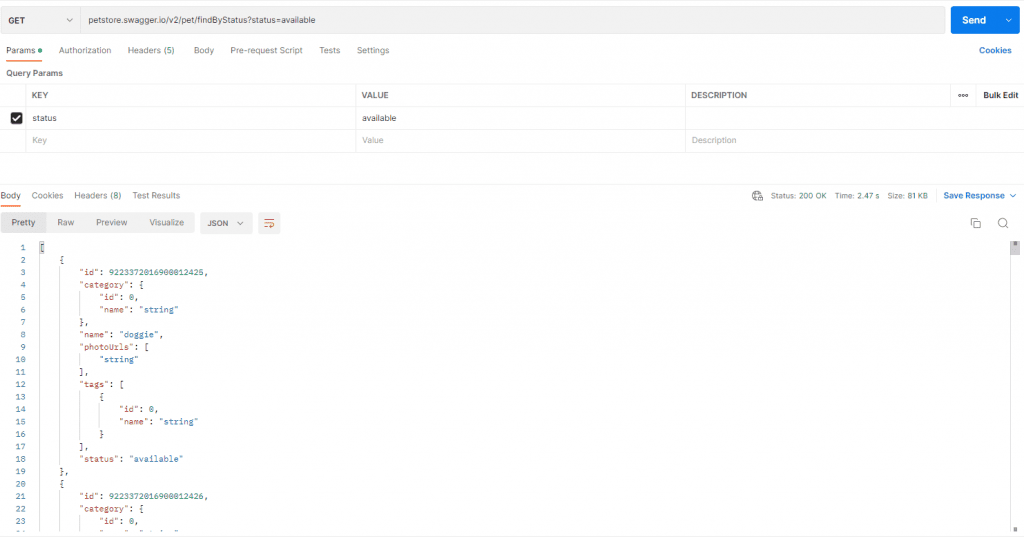
Query parameters: Here, you will see the query parameters of your request URL. They are in the key and value pair format, which means you can change the value from here.
Body: In the body section, you will see the response to your request. By default, you get the response in the JSON format, which also happens to be the most used. But, you can change it to other formats like XML, HTML, or text.
Status: Another notable field is status. Currently, it is showing 200 OK which means the request was successful. In the case of GET, it shows the data has been fetched successfully. Other HTTP response status codes you might encounter are 401 - Unauthorized, 404 - Not Found, 201 - Record Created, 504 - Gateway Timeout, etc.
What’s New: Postman v10
Postman v10 is the latest stable version of Postman. It includes some major bug fixes and there are some new features as well. Here, we’re going to learn more about these new updates.
- Native Git Support
In v10, you can connect the source code repository to the Postman. It allows you to maintain proper API documentation, tests, and specifications too. This new update also improves the level of collaboration between developers because you’ll now get Git’s branch-based workflow. Now, you can commit and push the changes without disrupting other developers.
Since you get the git native support, you’ll also be able to create centralized storage of the API data. You can store data related to APIs like source code, definition files, tests, performance measurements, documentation, security audits, or whatnot. Because of the centralized data center, security is also enhanced. Now, you can better manage security controls at the team, partner, and public levels.
- Test Automation
API automation is nothing new to Postman, but this latest update has taken it to the next level. You can automate throughout the DevOps lifecycle. And with the native git integration that v10 provides, you can store your tests and even run them through CI/CD (Continuous Integration and Continuous Delivery) pipelines. The Newman CLI is even easier to use, especially with continuous integration servers.
With the Newman CLI, you can run automated API tests via the CLI and then send back the data to Postman for creating reports and everything.
- API Governance
API governance is a set of rules that makes sure the API environment and behavior remain consistent company-wide.
Tell us what you like or what you want
In this article, we barely scratch the surface of the iceberg. Think of this as a beginner's guide to Postman. However, if you want to learn more detailed and advanced stuff about Postman then please leave a comment below. We will add your solution to this blog and update you regarding the same.
%201.png)

%201.png)

%201.png)