

Clean data makes your CRM durable. When relationships snap, picklists drift, or owners are wrong, forecasts wobble and customer conversations lose their footing. So when you’re migrating to something like Salesforce, a strong strategy is how you set the table for sales, service, and marketing to see the same story.
There is a cost story here too. IBM’s latest research puts the average cost of a breach at 4.88 million dollars in 2024, up from 4.45 million in 2023, driven by lost business and post-incident response. That rise is the largest jump since the pandemic period. Because migrations often touch identities, emails, attachments, and contracts, treating data quality and security as first-class work is basic risk management.
So, before you start visualizing the ROI of your Salesforce implementation services, here’s the roadmap you’ll need to get data migration right.
What Salesforce Data Migration Is, and Why Teams Actually Do It
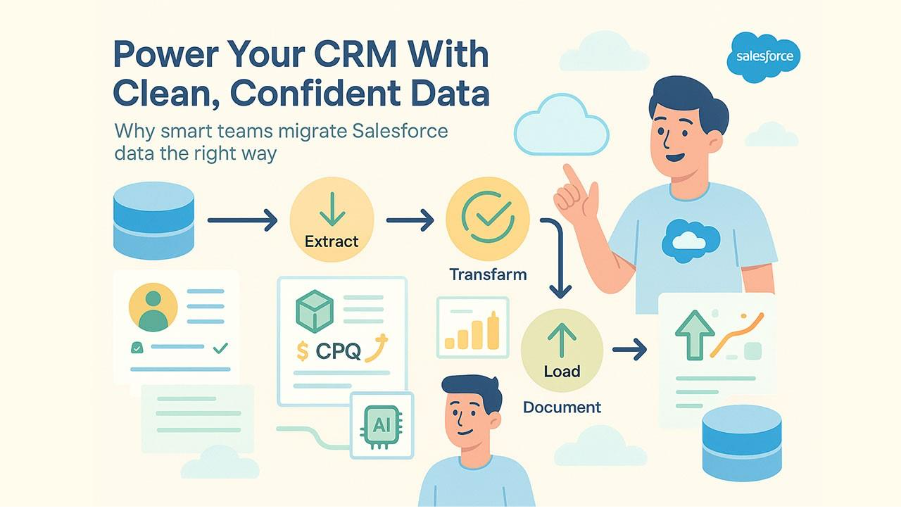
A Salesforce data migration moves records, files, and relationships from one or more sources into Salesforce, then proves the result. Think extract, transform, validate, load, and document. The real goal is not “we pushed data in.” The goal is a reliable customer picture people can bet decisions on.
Why does this project show up? Common triggers include consolidating orgs after a merger, escaping a legacy CRM, pulling finance or subscription data into core objects for a truer view of revenue, or preparing for AI use cases that depend on clean account, contact, and activity history. For organizations managing complex pricing or quote-to-cash processes, clean migration data also becomes the foundation for successful Salesforce CPQ consulting engagements, where accurate product, pricing, and customer relationship data directly impact quoting accuracy and deal velocity. Migration becomes the moment to fix duplicates, standardize values, and decide which system owns which field.
It’s also how companies finally end up with the single source of truth the actually need to get everything running in sync. Good data makes Salesforce the hub that keeps your business moving forward, bad data leaves your teams running in circles.
The Steps for a Successful Salesforce Data Migration
A good migration feels calm because the plan is doing the heavy lifting. You’ll make choices upfront that prevent surprises later, then you’ll prove each phase with simple checks that anyone on the team can understand.
Step 1: Plan Like a Risk Manager
Before the first row of data moves, pause for a second. Grab a coffee. Migration projects don’t explode because a file was too big, they explode because everyone sprinted at the same time, in different directions.
Success starts with a sentence: what does finished actually look like? Are you retiring a system, combining orgs, fixing a bad setup, or rebuilding trust after years of duct-tape CRM decisions? The answer changes everything: field priority, object order, timelines, even how you’ll define success in the room.
Get a handful of people who know the data, not just the dashboards. A good Salesforce team includes admins who understand your automations, analysts who can spot data quality issues before they compound, and business owners who know which fields actually drive decisions versus which ones just exist. Then sketch a timeline you can live with. Add padding on purpose. Somewhere in the middle, you will find duplicated contacts tied to the wrong accounts, invisible automation that wakes up at 2 a.m., or an integration nobody remembers owning. Build space for discovery and write things down in plain language, so no one has to decode tribal knowledge later.
A migration plan only needs to answer a few questions:
- Where is each data set coming from?
- Who has final say on field mapping?
- How will we test before production gets touched?
- If something breaks, what’s the fastest path back to safe?
When you’re ready to load, think in layers. Parents first. Accounts, then Contacts, then Opportunities. The order matters. And give Salesforce a way to connect the dots when the data lands. External IDs are your best friend here. They’re the reason relationships snap into place instead of turning into a forensic investigation later.
Step 2: Clean and Map the Data
Let’s kill a common myth. Teams always say they’ll clean the data once it’s in Salesforce. They never do. Messy data doesn’t improve with relocation, it multiplies. It spreads into dashboards, automations, segmentation, and territory rules until inaccuracies start looking normal.
The clean-up has to happen while the data is still sitting still.
Start ruthless and practical. Strip out anything that doesn’t serve a real process. Old leads no one will call. Test accounts. Abandoned pipelines. Every extra row you carry forward becomes something you’ll eventually have to explain, fix, or filter out later.
Then make things uniform. Pick one way to write company types, regions, lifecycle stages, country names. Set a rule and apply it everywhere.
Line up your fields in a shared document and treat it like sacred material. Every source column should have a destination, format, owner, and transformation rule if needed. This file becomes the reason your migration survives questions later.
Scan for the silent issues next. Accounts with no primary contact. Deals with missing close dates. Cases without owners. These don’t explode on import, they dissolve slowly into reporting blind spots if you ignore them.
If data comes from more than one system, you’ll find the same values spelled five different ways. Fix them before they merge into disagreement. Salesforce won’t know they’re the same unless you decide they are first.
Step 3: Prepare Your Salesforce Environment
Give your data a clean runway. In a sandbox, add missing fields and record types, align picklists to your new standards, and pause anything that could reshuffle records while you load. The Data Import Wizard can optionally trigger automations, so be explicit about that setting during tests to avoid surprises.
Protect people’s information while you rehearse. Salesforce Data Mask scrambles sensitive fields in full or partial sandboxes, and once you mask, you can’t unmask, which is exactly the kind of safety you want in lower environments. Run masks on a schedule so test orgs don’t drift.
Document an automation pause plan, too. List active Workflow Rules and Process Builder processes, decide what’s paused during bulk loads, then schedule the move to Flow.
If your team hasn’t gotten around to tightening up Salesforce data migration best practices, don’t wait until you’re already in the weeds. The smartest move is pulling in a partner before you’re under pressure. Tell them the messy truth, what’s broken, what’s fragile, what gives you heartburn, and what “done” actually needs to look like.
Step 4: Pick Your Power Tools
Small and tidy data calls for simple tools. Chaotic data needs something tougher.
- Salesforce Data Import Wizard: Lives inside Salesforce, no install needed. It’s ideal when you’ve got clean, uncomplicated files under 50k records. Leads, contacts, one-off updates, small projects, that’s its comfort zone. Friendly, visual, safe.
- Salesforce Data Loader: The classic. Desktop or command line, no fluff. It’ll insert, update, upsert, or delete at scale and give you failure files you can actually work from. If you’ve ever loaded data in a tight window or fixed a bad import at night, you’ve used this.
- Dataloader.io: Same spirit as Data Loader, but browser-based and tidy. Scheduling is the selling point. If you’ve got recurring imports, monthly refreshes, or repeatable jobs, this one earns its place.
- Jitterbit Data Loader: The connector of worlds. Great when Salesforce is only one of several systems talking to each other. It transforms data on the way in, which saves you pre-load spreadsheet agony.
- SFDMU (Salesforce Data Move Utility): Made for people who don’t flinch at command line tools. It shines in org-to-org moves or sandbox seeding, especially when relationships need to stay perfectly intact.
- Salesforce Inspector: This one’s your sidekick. A Chrome extension, quick, direct, brilliant for surgical edits, spot fixes, and quick exports without launching a full-stack tool.
- Enterprise ETL Platforms: The heavy machinery. Overkill for small jobs, a lifesaver for regulated migrations, high volumes, or multi-system transformations where traceability and control really matter.
Use one tool if the job is simple. Use five if it’s complex. Just don’t pick them based on marketing pages. Pick them based on reality.
Step 5: Execute Without Drama
Run a pilot in a sandbox first. Load a representative slice, check record counts, spot check relationships, and review error logs. Once the pilot behaves, scale with batches sized for your org’s throughput.
Decide your cutover style. For some teams, a short change freeze and a single big push is fine. If that’s risky, use a phased migration. Move the bulk of history first, then keep systems aligned by streaming deltas with Change Data Capture. CDC retains events for about 72 hours, so subscribers can replay anything they missed during maintenance windows or network hiccups.
Treat security like part of execution, too. Use least-privilege integration users for loaders, enforce MFA on admin tools, and store mappings, logs, and error files in a controlled space. If you script loads, version your scripts and keep a checksum of the installer you used so you can prove provenance later.
As you run each batch, reconcile as you go. Compare expected and actual record counts, validate key relationships with spot queries, and capture rejects for quick rework rather than letting errors pile up. Bulk API 2.0 gives you clear job and batch statuses, which makes it easier to automate these checks.
Step 6: Prove it Works
Time to show your work. Start with simple proofs everyone can understand. Run custom reports that compare expected and actual record counts by object, then spot-check key relationships like Opportunities to Accounts and Contacts to Accounts.
Next, make data health visible. Stand up a lightweight dashboard for duplicates, missing required fields, and picklist anomalies. You can use native Duplicate and Matching Rules to catch look-alikes, then run periodic duplicate jobs to tidy what slipped through during cutover. If you prefer a jump-start, Salesforce Labs’ free Data Quality Analysis Dashboards on AppExchange gives you a quick baseline you can tune.
Then, close the loop with users. Give sales and service leads short checklists for their objects, collect exceptions in a shared log, then fix patterns rather than one-offs. Once the core is clean and usage settles, you can finally point your efforts at the bigger prize, a unified data layer that fuels smarter segmentation, analytics, and AI.
Salesforce Data Cloud can blend customer data into one profile setup without you building a maze of copies, and the zero copy setup means you’re asking questions in the warehouse, not cloning it into five other places first. After launch, dig into the numbers in week one, then check again around 30 days, and once more at 90. A pattern like that keeps things honest, long after the kickoff calls fade into the past.
Clean Data Makes Everything Else Possible
A good migration feels uneventful because the plan did the heavy lifting. You scoped what mattered, agreed data contracts, cleaned and mapped with intention, rehearsed in sandboxes, then shipped in batches you could prove. Now the org’s faster, reports make sense, and teams trust what they see.
Keep that posture. Run your health checks on a simple cadence, archive cold history so users stay quick, and tighten automation where it helps more than it hurts. When new systems arrive, you’ll already have the playbook to bring them in without rocking the boat.
If this project uncovered deeper model or process debt, treat the win as momentum. Tackle one improvement per quarter and protect the gains you’ve made. Clean data isn’t a one-time event, it’s the habit that keeps everything else working.
%201.png)

%201.png)

%201.png)